Thank you Roots and Harvest for sponsoring this post.

What is Kimchi?
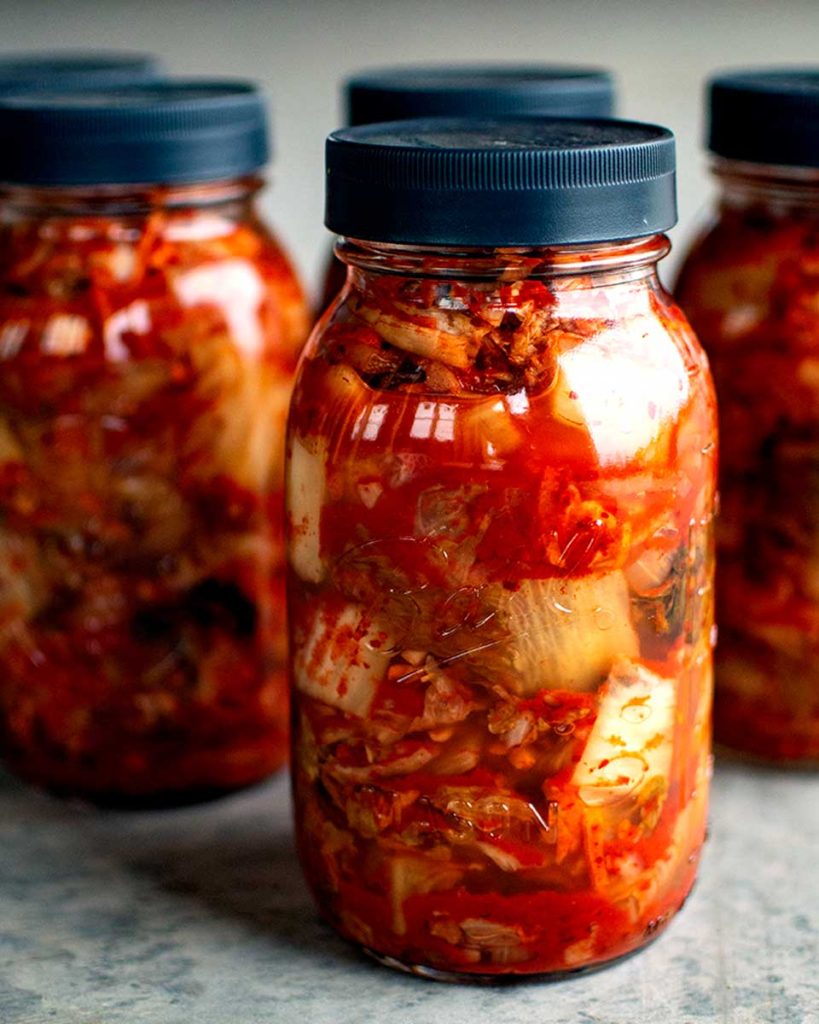
Kimchi is a staple dish in Korean cuisine made of salted and fermented vegetables. The name kimchi encompasses any vegetable that is fermented in the korean style. Believe it or not, there are almost 200 documented types of kimchi!
Many people are familiar with the traditional napa cabbage kimchi also known as baechu kimchi. It usually includes napa cabbage, radish, and gochugaru (korean chili pepper powder) with a few additional spices and vegetables. In Korea, kimchi is traditionally eaten as a side to every meal or even incorporated into the main dish.
My husband Cameron lived in Korea for two years and learned to love kimchi while he was there. He introduced me to it and says my version is one of the best he’s tried (he may just be saying that because it’s me though, haha!).

Health Benefits
In addition to being a delicious accompaniment to meals, kimchi has numerous health benefits. It is known to improve digestive health because it is chock-full of probiotics. Kimchi also contains many vitamins and antioxidants including folate, beta-carotene, choline, potassium, vitamin A, vitamin C, and vitamin K, and calcium.
I can also add my own personal experience here that kimchi is one of the foods that really helped me to improve my health when I was dealing with acid reflux and IBS. It seems like all the spiciness would have the opposite effect but it didn’t. All the probiotics from fermentation and lots of garlic in the kimchi works wonders!

How to Make Your Own Kimchi
Kimchi is surprisingly easy to make at home. Our family makes traditional napa cabbage kimchi, with a little bit of variation in the vegetables based on what we have available in the garden. Traditionally, seafood is added but I don’t use it because I’m not a big fan of the flavor.
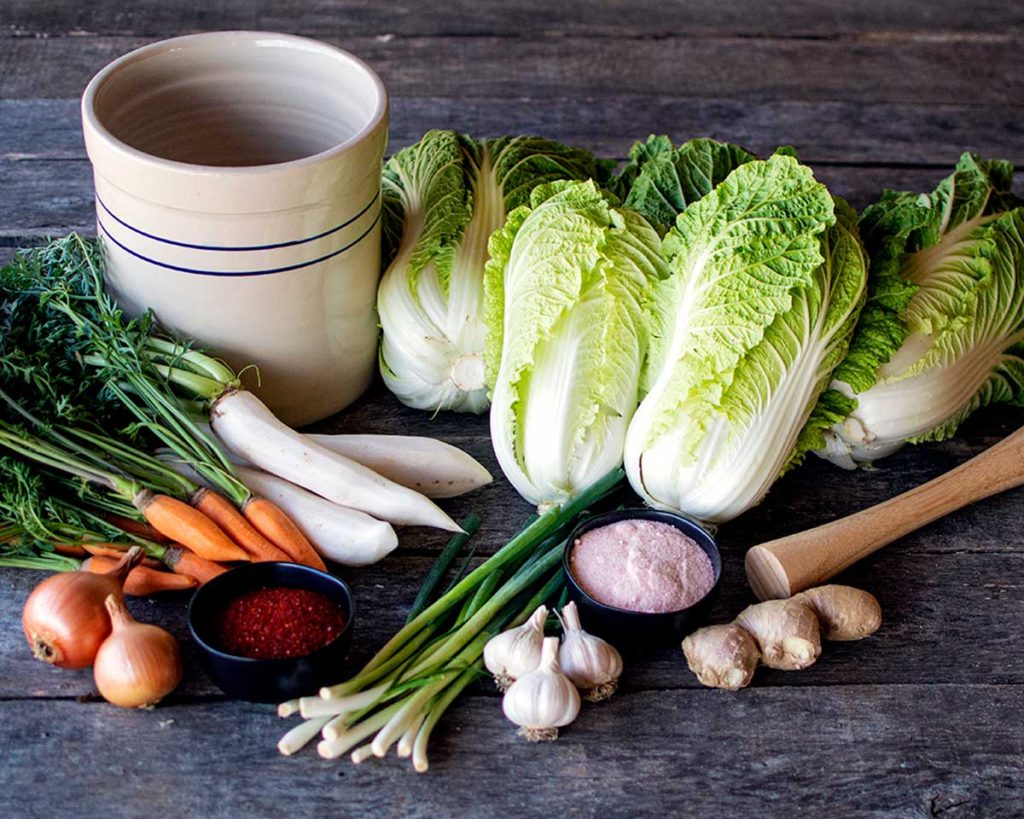
The recipe below uses napa cabbage, daikon radish, garlic, ginger, gochugaru, carrots, scallions or chinese chives, and a yellow onion.
These vegetables are all in season in fall with the exception of the yellow onion and garlic, which are cured and stored from a summer harvest.
Gochugaru (korean chili pepper powder) may be tricky to find locally. You can check asian markets or the ethnic foods section at your grocery store. It is much easier to find and obtain online, and can be found HERE. Or if you plan ahead early, you can grow your own korean peppers and make homemade gochugaru!
If you want authentic kimchi flavor the gochugaru is a must-have! I personally think it is worth the effort to buy or grow. But if you would like to try a substitute, cayenne pepper flakes or chipotle powder can be used as an alternative. Keep in mind the results will be quite different because cayenne peppers are spicier and chipotle peppers are smokier than gochugaru.

Supplies
- 2 Gallon R&H Homestead Stoneware Crock
- 2 Gallon Ohio Stoneware Fermentation Crock Weights
- Cabbage Stomper
- Mason Jars for storing
Ingredients
For the Brine:
- 2 gallons unchlorinated water
- 2 cups unrefined sea salt
For the Kimchi:
- 10lbs napa cabbage (4-5 large heads)
- 2 cups shredded daikon radish
- 2 cups shredded carrots
- 18 cloves garlic, peeled and minced
- 1 small yellow onion, sliced very thin
- 1 cup chinese chives or scallions, sliced into ½ inch pieces
- ¼ cup ginger, peeled and minced
- 1 cup gochugaru (korean chili powder)
- 1 tablespoon sugar
- 1/4 cup sweet rice flour (optional thickening agent)
- up to 3 cups reserved liquid from the brine
Directions
1. Prepare the brine by mixing the water and sea salt together in a very large mixing bowl until the salt dissolves. You can also split the brine into two bowls using 1 gallon of water and 1 cup of salt per bowl if your bowl isn’t big enough.
2. Wash the cabbage in cool water.
3. Remove and reserve a few of the large outermost leaves of the cabbage for later.
4. With the remaining cabbage, slice the cabbages into quarters and place into the brine.

5. Add a plate over the top of the cabbages. Then add your weights over that to keep the cabbage submerged in the brine.
6. Let the cabbage soak in the brine for 4-6 hours.
7. After soaking, reserve 3 cups of brine and set aside. (Don’t forget this step!)
8. Then drain the cabbage in a colander.

9. Chop cabbage into bite size pieces and place in a very large bowl.
10. Add radishes, carrots, garlic, onion, chinese chives, ginger, gochugaru, and sugar. Mix well.

11. Transfer the mixed vegetables and spices into your fermentation crock a little at a time, using the stomper to firmly push down the vegetables, Packing as tightly as possible.

12. Once all the mixture is in the crock and stomped down, add the reserved whole cabbage leaves over the top. This will create a cover to keep the chopped vegetables from coming out of the brine and floating to the top.
13. Place your weights on top.
14. Add only enough reserved brine to cover all the vegetables but only a little bit. Additional liquid will release from the vegetables during the first few days of the ferment. *IMPORTANT* If you add too much brine, the end result will be salty and watery, again add only enough that it covers the vegetables fully after weighing it down.

15. Cover the crock with a plate, lid, or towel, and let ferment in a cool, dark area for 7-28 days. You can begin taste testing at 7 days. The longer you ferment the more pickled the flavor will become.
16. When the ferment is finished, remove kimchi from the crock and place in individual mason jars with lids. Recipe yield is approximately 5 quarts of kimchi.
17. Kimchi should be stored in the refrigerator when the ferment is finished. It can also be stored in a root cellar as long as it hovers between 32 and 40ºF. Under these conditions, kimchi will stay fresh for nine months to one year.

Recipe Notes
- Sometimes during the fermentation process you’ll see a white film form on the top of the brine. This is called scum and is harmless. Use a sieve to scoop off any film you see.
- Instead of adding sugar, try adding a ¼ cup asian pear, julienned.
- You can also experiment with different vegetables and amounts to your taste. Just be sure to keep the salt to water ratio in the brine the same. Salt helps keep the bad bacteria away and helps the good bacteria to flourish.
- Ideal fermentation temperature is between 55 and 75ºF. When fermenting in a room temperature at the warmer end of the spectrum the fermentation process happens faster. On the cooler end of the spectrum it will take longer to ferment.


2 comments
I sure would love to taste this before investing this much into it. Do you think I could half the recipe successfully?
Absolutely! This recipe does make a lot of kimchi. Just cut all ingredients in half. For the brine, you just need one gallon of water and one cup of the sea salt.